Case study: A comprehensive Farmington, Michigan insulation retrofit, from attic to crawlspace

“The house is much more comfortable and we are still learning how to use the system most effectively during extremes in temperature throughout the year.”- Tom, homeowner in Farmington, MI
Most homeowners fix a comfort problem one piece at a time. Insulate the attic one year, deal with the crawlspace a few years later, replace the furnace whenever it finally gives out.
Tom's project in Farmington, Michigan took a different approach. Upper attic, lower attics, knee walls, rim joist, and a full crawlspace encapsulation, plus a complete heat pump conversion, all in one project.
A few months after the work wrapped, Tom put together his own before-and-after analysis of his gas and electric bills and sent it to us unprompted, just to see how it compared with what we'd expect.
The numbers hold up, and they're a good example of what happens when the whole building envelope gets addressed at once instead of one symptom at a time.
At a glance: Tom's energy savings
| Metric | Before → After | Change |
|---|---|---|
| Natural gas use (winter) | 17.8 → 13.8 CCF/month avg | down 22.5% |
| Winter electricity use | 759 → 505 kWh/month avg | down 33.5% |
| Summer cooling electricity use | 1,340 → 971 kWh/month avg | down 27.5% |
| Air leakage (blower door) | 3,771 → 2,998 CFM50 | down 20% |
If you'd like us to take a look at your home in Southeast Michigan, give us a call at (248) 291-7815 or grab a time on our calendar:
Since 2009, more than 3,000 Michigan homeowners have trusted Ecotelligent Homes to make their homes more comfortable and efficient. We're a woman-owned, women-led contractor, and every project comes with a price match guarantee and a satisfaction guarantee.
Jump into the case study
What we found: five weak points in the same envelope
Tom's complaints were ones we hear from a lot of Michigan homeowners in older homes: the upstairs ran hot in summer and cold in winter, the room above the crawlspace never felt right, and the original 1989 furnace and single-stage air conditioner couldn't move air evenly through the house.
The energy audit backed up every one of those complaints:
- Upper attic underinsulated. Measured R-19.6 against an ENERGY STAR target of R-60, with no air barrier.
- Lower attics essentially bare. R-0, no insulation at all.
- Knee walls uninsulated. R-0, with no air sealing.
- Rim joist wide open. R-3, a classic entry point for cold air and drafts.
- Crawlspace with nothing protecting it. R-0, no vapor barrier, open to ground moisture.
- A leaky envelope overall. Blower door test measured 3,771 CFM50, with no mechanical ventilation in the home at all.
- Original 1989 mechanicals. The single-stage 80% AFUE furnace and 9.0 SEER air conditioner were both original and undersized for how much energy the house was actually losing.
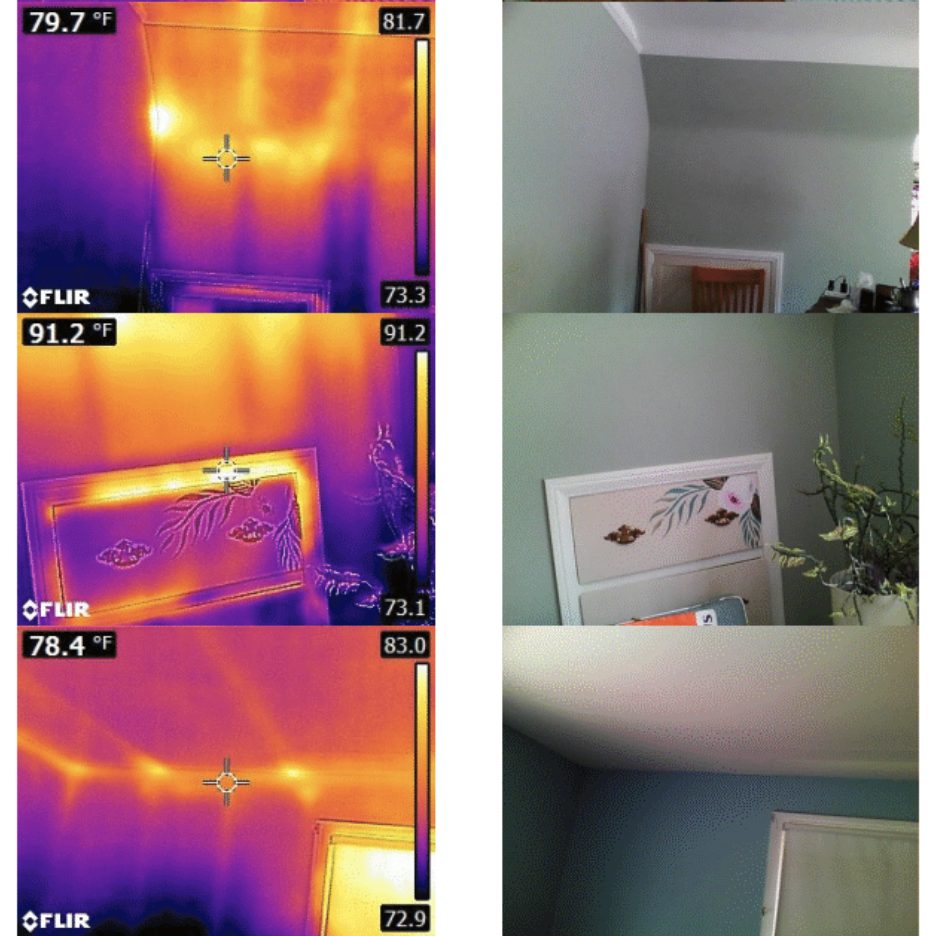
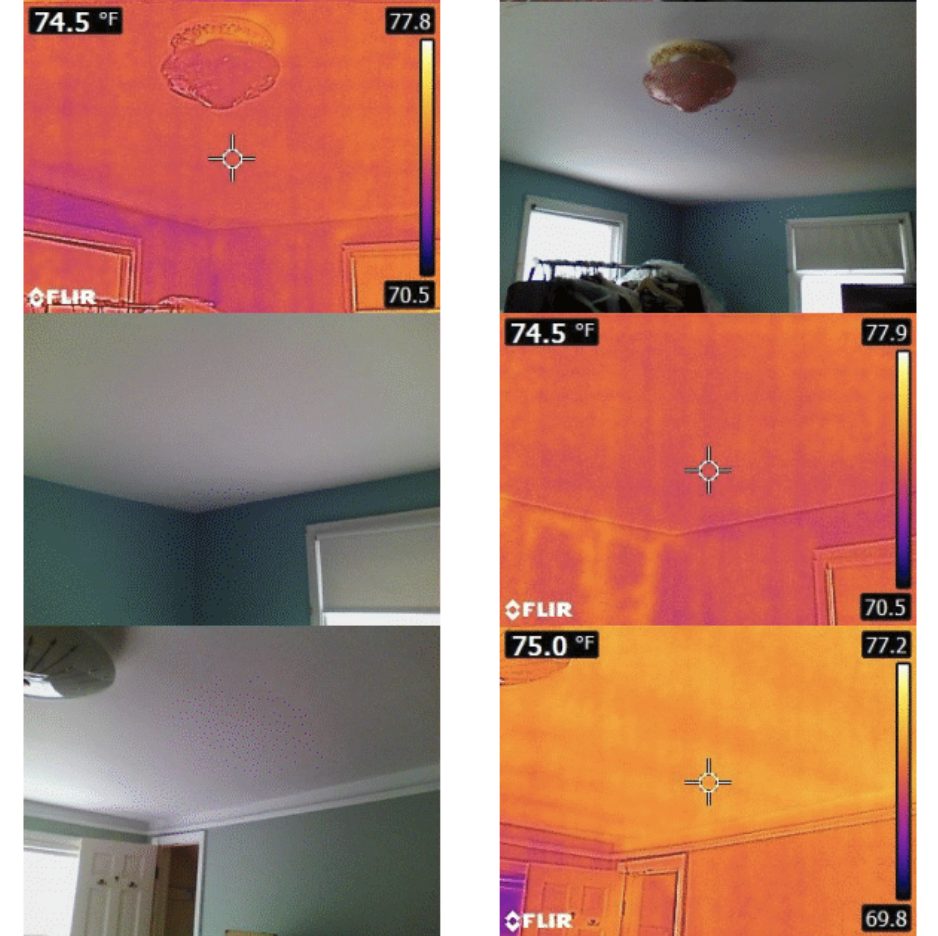
Thermal imaging confirmed the pattern: cold, uneven surfaces at the ceiling line, along the closet walls, and around the rim joist. None of this is unusual for a home this age. What made Tom's situation worth a closer look is that every one of these weak points fed into the same complaints he was already living with.
What we did: attic, knee walls, rim joist, and crawlspace
We treated the whole envelope as one connected system instead of a list of separate fixes.
Upper attic
- Air sealed the top plates and wire penetrations with single-part spray foam
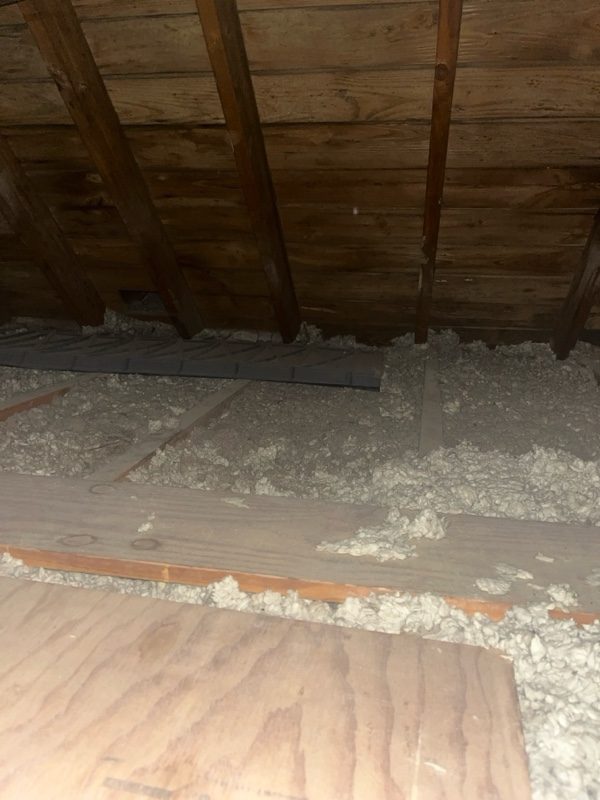
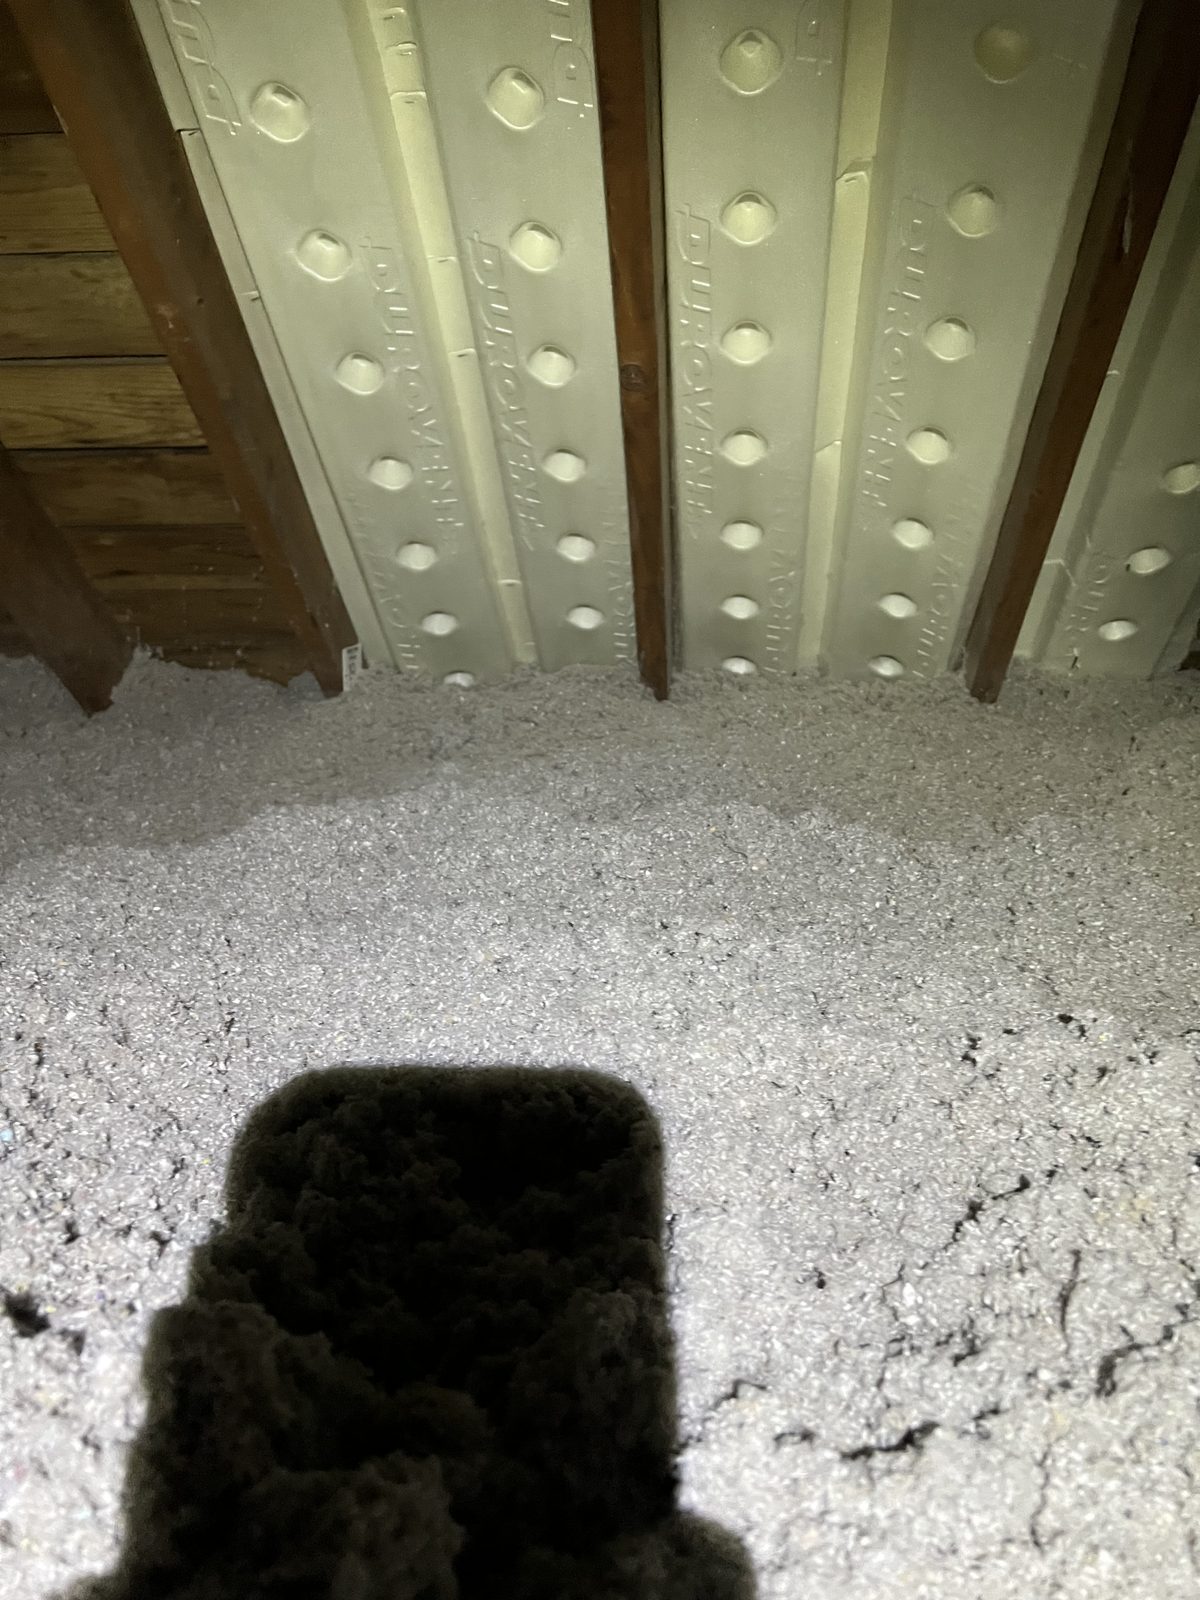
- Blew in an average of 16 inches of cellulose to reach R-60
- Removed the old whole house fan and installed a new HV1600 unit with remote and high/low switch controls
- Rebuilt the attic hatch with new trim, weatherstripping, and an insulated access box
- Installed 6-foot foam baffles to keep attic ventilation working correctly
Lower attics and knee walls
- Sealed and insulated both areas with closed-cell spray foam, bringing the lower attics up to R-38 and the knee walls up to R-20
- Finished with thermal barrier paint to meet code
Rim joist
- Air sealed and insulated the rim joist with closed-cell spray foam, taking it from R-3 to R-21
Crawlspace encapsulation
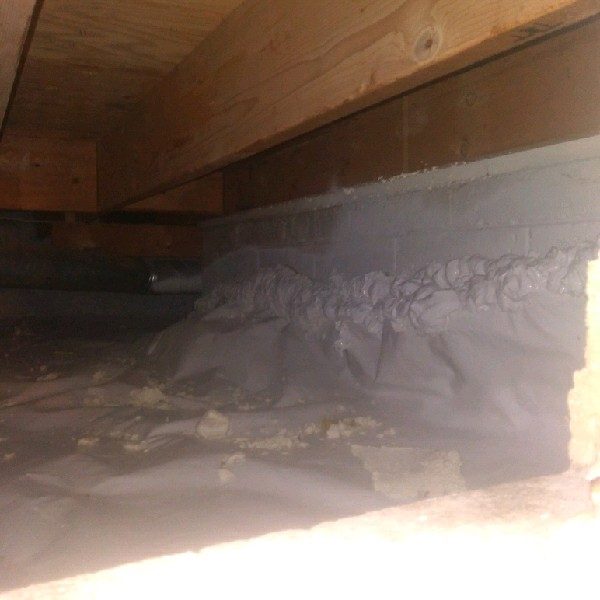
- Installed a continuous 12-mil vapor barrier across the ground and sealed it to the crawlspace walls
- Air sealed and insulated the crawlspace walls and rim joist with closed-cell spray foam for R-21
- Finished with a code-required thermal and ignition barrier coating
Mechanical systems
- Replaced the original single-stage furnace and 9.0 SEER air conditioner with a Carrier Infinity heat pump system, up to 18 SEER with a five-stage compressor
- Added an Ecobee smart thermostat with three-year warranty for better scheduling and control
Here's how the building envelope changed, verified by our Six Point Quality Assurance Check:
| Area | Before | After |
|---|---|---|
| Upper attic | R-19.6, no air barrier | R-60, air sealed |
| Lower attics | R-0, no air barrier | R-38, air sealed |
| Knee walls | R-0, no air barrier | R-20, air sealed |
| Rim joist | R-3, no air barrier | R-21, air sealed |
| Crawlspace | R-0, no vapor barrier | R-21, air sealed |
Every number here was measured before and after, not estimated.
Why doing it all together matters
This is the part worth slowing down on.
Tom's upstairs temperature swings, his cold crawlspace room, and his high bills weren't three separate problems. They were symptoms of the same leaky, underinsulated envelope.
A homeowner could spend a few years chasing these one at a time: insulate the attic this year, maybe get to the crawlspace in a couple more, replace the furnace whenever it finally fails. Each fix would help a little. None of them alone would fix the whole picture.
Tackling all five areas plus the mechanical systems in one project meant nothing was left to undercut the rest. A tight attic doesn't do much good if the crawlspace below is still open to the ground and the rim joist is still leaking.
It also meant the new heat pump could be sized correctly from the start. Heating and cooling equipment should be sized to the home it's actually going to condition, not the leaky, underinsulated version of that home.
Because the envelope work was planned alongside the heat pump instead of years apart, the new Carrier system was sized for the tighter, better-insulated house Tom was about to have, rather than oversized to fight drafts and heat loss that were about to go away anyway. A right-sized system runs more efficiently, cycles less, and holds temperatures more evenly than one sized for a leakier home.
That's a meaningful part of why Tom's savings numbers came in the way they did. When every weak point gets closed and the equipment is sized for the improved house rather than the old one, the improvements compound instead of just adding up.
The results: less energy, more comfort
Our post-project blower door test measured 2,998 CFM50, down from 3,771. That's a 20 percent reduction in air leakage, hitting our target exactly. Indoor air quality readings across temperature, humidity, CO2, and particulates all came back good after the work.
But the numbers that matter most are the ones Tom tracked himself, comparing his utility bills from before the project to the same months afterward:
- Natural gas use down 22.5 percent
- Winter electricity use down 33.5 percent
- Summer cooling electricity use down 27.5 percent
Combined, Tom estimates his home used roughly 28 percent less energy through the winter months, with even bigger savings in summer.
Frequently asked questions
Does crawl space encapsulation help with humidity? Yes. An open, dirt-floor crawlspace lets ground moisture rise directly into the air above it, which is a common reason a room over a crawlspace feels damp and cold in winter, humid in summer, or both. Sealing the ground with a vapor barrier and insulating the walls and rim joist, as we did for Tom's crawlspace, stops that moisture transfer and brings that space's temperature and humidity in line with the rest of the house.
Why does my upstairs feel hot in summer and cold in winter? Uneven temperatures usually trace back to insulation and air sealing gaps in specific spots: the attic, knee walls, and rim joist most often. Warm air rises and escapes through a thin or leaky attic in winter, and in summer that same weak envelope lets heat build up upstairs. Fixing those areas, the way we did across Tom's attic and knee walls, evens out the difference room to room.
Should I insulate and encapsulate before upgrading to a heat pump? In most cases, yes. A heat pump's efficiency depends heavily on how much heating and cooling load it actually has to cover. A leaky, underinsulated home makes any system, heat pump or otherwise, work harder to hold a temperature. Sealing and insulating first, the way Tom's project did before the heat pump went in, lets the new system run the way it's designed to.
What's a good blower door test result for a Michigan home? It depends on the size and age of the home, but the general goal is a meaningful reduction in air leakage, not a single fixed number. Tom's home dropped from 3,771 to 2,998 CFM50, a 20 percent reduction that hit our target. We test before and after every project so you can see the actual result, not an estimate.
Do insulation projects still qualify for a federal tax credit? No. The federal Energy Efficient Home Improvement Credit (25C), which covered up to 30% of insulation and air sealing costs, ended December 31, 2025. Projects completed in 2026 don't qualify for that credit. Utility rebates through DTE Energy and Consumers Energy change from year to year, and our team applies everything a project qualifies for at the time it's done.

Ecotelligent Homes
Since 2009, more than 3,000 Michigan homeowners have trusted Ecotelligent Homes to make their homes comfortable and efficient. If you want an energy audit, insulation, or heat pump services, give us a call anytime: (248) 291-7815. Satisfaction guaranteed.
Got a project in mind?
Tell us about your project, and we'll send ballpark pricing in 2 minutes or less.